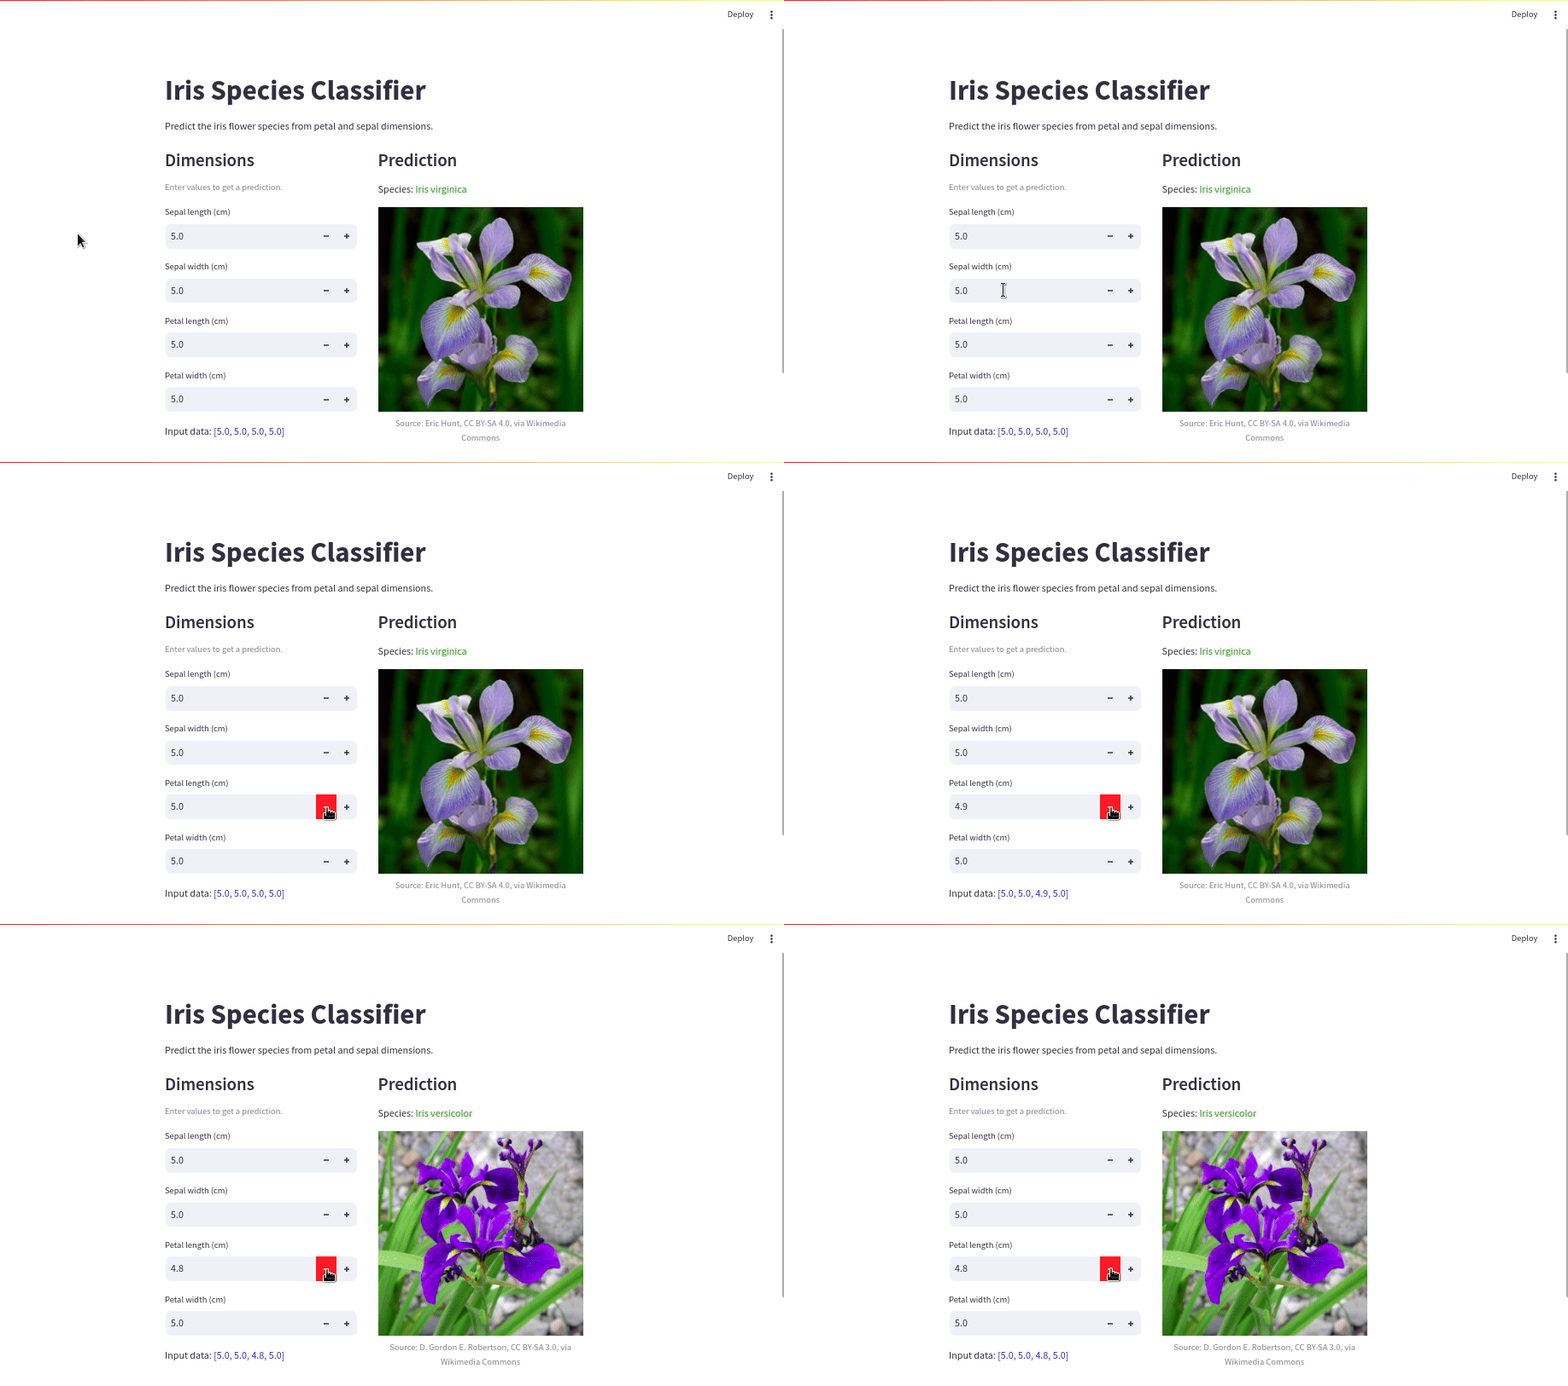
Once a machine learning model performs acceptably well on validation data, we’ll likely wish to see how it does on real-world data. Streamlit makes it easy to publish models to collect and act on user input.
How it works
Streamlit provides a superb API that enables you to create interactive web apps within Python scripts.
You can:
-
Write various text elements: captions, code-blocks, headings, LaTeX, markdown, preformated-text and titles.
st.title("Main title") st.write("App description") -
Obtain user input with input widgets: buttons, checkboxes, camera-input, color-pickers, date-input, download-buttons, file-uploaders, multiselect, number-input, radios, selectboxes, sliders, text-areas, text-input and time-input.
text = st.text_area("Input Text", height=200, max_chars=300) date = st.date_input("Select Date", format="DD/MM/YYYY") st.download_button("Click to Download", contents) -
Plot charts: area-charts, bar-charts, line-charts and maps. With support for Altair, Bokeh, Matplotlib, Plotly and Vega-Lite.
st.bar_chart(some_df) st.pyplot(mpl_fig) st.plotly_chart(plotly_fig) -
Include media files: audio, image and video.
st.audio(audio_data, format="audio/wav", start_time=0) st.image(image_data, caption="...", width=320) st.video(video_data, format="video/mp4", start_time=0) -
Design app structure with layouts and containers: columns, expanders, sidebars and tabs.
tab1, tab2 = st.tabs(["Tab 1 name", "Tab 2 name"])
col1, col2, col3 = st.columns(3)
The Streamlit API Reference contains detailed examples of how to apply these and many more advanced features.
Demo
Let’s start by creating a simple model to deploy:
>>> from sklearn.datasets import load_iris
>>> from sklearn.ensemble import RandomForestClassifier
>>> from sklearn.model_selection import train_test_split
>>> data = load_iris()
>>> X_train, X_test, y_train, y_test = train_test_split(data.data, data.target,
...                                                     random_state=1)
>>> model = RandomForestClassifier(random_state=2)
>>> model.fit(X_train, y_train)
RandomForestClassifier(random_state=2)
>>> print(f"Accuracy: {model.score(X_test, y_test):.2%}")
Accuracy: 97.37%
>>> import joblib
>>> joblib.dump(model, "model.gz")  # save model to file
['model.gz']
Next, we define our Streamlit app in a Python script (often named streamlit_app.py):
import joblib
import streamlit as st

st.title("Iris Species Classifier")
st.write("Predict the iris flower species from petal and sepal dimensions.")


@st.cache_resource
def load_model():
    """Fetch and cache the fitted model.

    Returns:
        RandomForestClassifier: Trained Scikit-learn model.
    """
    return joblib.load("model.gz")


model = load_model()
species_dict = {0: "setosa", 1: "versicolor", 2: "virginica"}
image_attributions = dict(
    setosa="Денис Анисимов, Public domain, via Wikimedia Commons",
    versicolor="D. Gordon E. Robertson, CC BY-SA 3.0, via Wikimedia Commons",
    virginica="Eric Hunt, CC BY-SA 4.0, via Wikimedia Commons",
)
dimensions_input_col, results_col = st.columns([0.45, 0.55], gap="medium")
with dimensions_input_col:
    st.subheader("Dimensions")
    st.caption("Enter values to get a prediction.")
    input_data = [
        st.number_input(
            dim,
            max_value=10.0,
            min_value=0.0,
            step=0.1,
            value=5.0,
            format="%.1f",
        )
        for dim in [
            "Sepal length (cm)",
            "Sepal width (cm)",
            "Petal length (cm)",
            "Petal width (cm)",
        ]
    ]
    st.write(f"Input data:\n :blue[{[round(x, 1) for x in input_data]}]")

with results_col:
    st.subheader("Prediction")
    predicted_species = species_dict.get(model.predict([input_data])[0])
    st.write(f"Species: :green[Iris {predicted_species}]")
    st.image(
        f"assets/iris-{predicted_species}.jpg",
        width=320,
        caption=f"Source: {image_attributions[predicted_species]}",
    )
Finally, we launch the app using the streamlit run command:
$ streamlit run streamlit_app.py

  You can now view your Streamlit app in your browser.

  Local URL: http://localhost:8501
  Network URL: http://192.168.8.102:8501

The code for this demo app is available on GitHub.
After confirming that everything works as expected, we can deploy the app to the Streamlit Community Cloud to make it available online. This typically involves:
- Signing up for a Streamlit Community Cloud account
- Logging in to https://share.streamlit.io/
- Connecting your GitHub account
- Deploying and managing apps from your Streamlit Community Cloud workspace.
The getting started guide has all you need to know.
